How to build the Duck Pond and Bridge in Minecraft
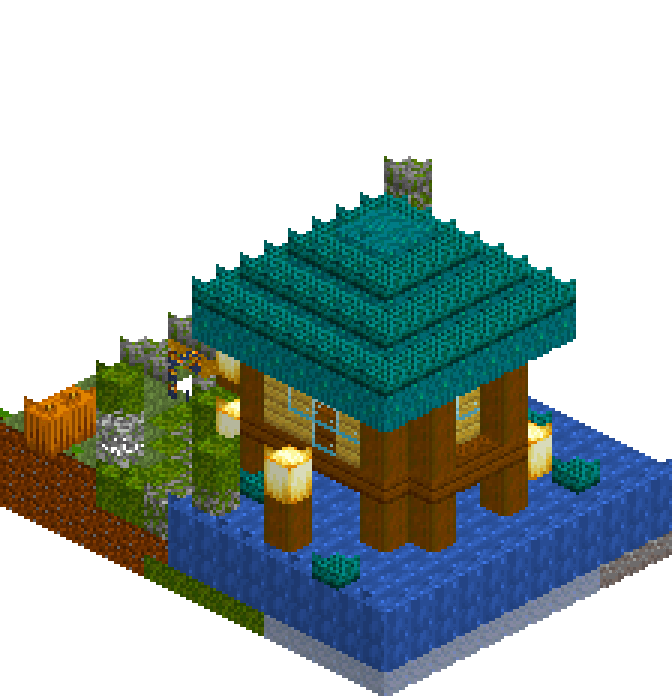
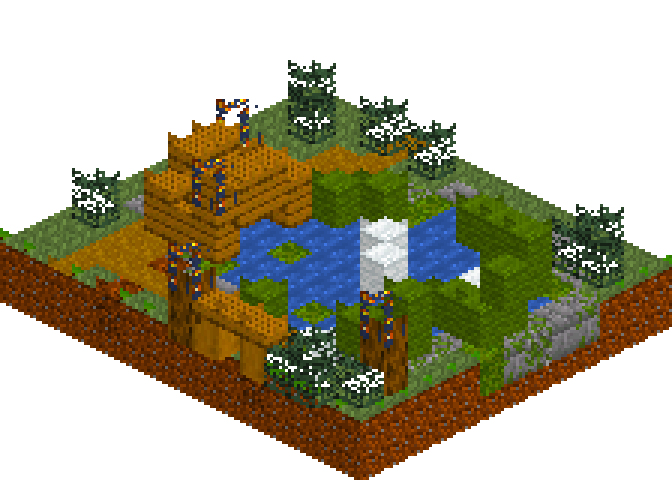
Fifteen blocks across and five tall, and most of that is grass and water. The pond gets drawn once, as a curve, and everything after it simply answers that curve: a lip of mossy cobble and stone brick, a plank bridge hopping the narrow western arm, reeds standing in the shallows, a bench, a bale of hay and three white ducks. It takes about twenty minutes and then quietly makes the rest of a base look finished. Nothing on the plot is symmetrical, so it never settles into looking like a model of a garden rather than a garden.
What you need
| Block | Count |
|---|---|
| Dirt | 128 |
| Grass block | 60 |
| Water | 60 |
| Sand | 39 |
| Mossy cobblestone | 18 |
| Clay | 17 |
| Dirt path | 17 |
| Green wool | 15 |
| Oak planks slab | 14 |
| Moss block | 12 |
| Spruce leaves | 12 |
| Oak planks | 12 |
| Gravel | 11 |
| Mossy stone bricks | 10 |
| Stone bricks | 7 |
| Cobblestone | 6 |
| Coarse dirt | 5 |
| White wool | 4 |
| Oak log | 4 |
| Lantern | 4 |
| Stripped oak log | 2 |
Counts are exact for the model above. Mine a little spare — nobody places every block first time.
Building it
Each stage names the layers it covers. Drag the slider on the model to that layer and you are looking at exactly what the stage describes.
1.Dig the bed before you pour the water
The whole plot is one box of dirt, fifteen by thirteen. On top of it, paint the pond's footprint in sand with a scatter of gravel and clay — that bed is the only reason a one-deep pond reads as water rather than a blue hole. Draw the outline freehand: a fat lobe on the right, tapering to a two-block arm on the left, and never step the edge in by the same amount twice. Keep that arm narrow, because it is where the bridge goes.
2.Water, stone lip, and a trail through
Cover the plot in grass, then pour water into the footprint drawn underneath. Lay the dirt path next: in from the south, over the neck of the pond, and away through the north-east corner. Then the lip — every grass block touching water, diagonals included, turns to stone. Mix it: mostly mossy cobblestone, some plain cobble and mossy stone bricks, the odd clean stone brick. One material reads as a kerb, four read as a bank that has been there for years. Where the lip meets the trail it swallows a block or two of path, which is exactly what a worn shoreline does. Finish with moss pressed into the stone and five more moss blocks flat on the water as lily pads.
3.Bridge ramps, reeds, bench and ducks
Two three-wide runs of oak planks land on the stone lip either side of the arm; those are the abutments the arch springs from. Reeds are single green wool blocks standing straight out of the shallows — keep them in loose clumps of two and three, never a row. The bench is a slab seat on the south bank with two stripped log posts behind it, a bale of hay alongside and a white wool duck on the grass. Two more ducks float well apart out on the water; set them side by side and they read as one white lump instead of two birds.
4.Close the arch, add the rails
The crown is two more rows of planks one level up, spanning the water so a clear block of air is left underneath for something to paddle through. That single step is the entire arch — anything taller would loom over a pond this size. Oak slabs go on the outer columns at both ends, leaving the middle column free to walk. The bench gets its backrest, the two lantern posts their second log, and three reed clumps a second block so the beds are not all one height.
5.Four lanterns, all of them low
Slabs finish the rails over the crown, then the lanterns go on: one at each end of the bridge, diagonally opposite rather than paired, one on the post beside the bench and one across the water on the far bank. Low light is the whole point — at eye level it pools on the path and throws a long reflection across the pond instead of lighting the scene from above like a street lamp. Walk the trail at dusk and check the reflection lines up under the arch.
Make it yours
- Draw the water first and let everything else answer it — the stone lip, the reeds and the bridge are all responses to that one curve, so a lazy curve is the only mistake worth undoing.
- Nothing here is symmetrical: the pond bulges right, the lanterns sit diagonally opposite, the trail leaves through a corner. Straighten any one of them and the plot starts to look like a park exhibit.
- In survival, green wool is dye plus wool — or skip it entirely and use sugar cane and tall grass. The silhouette is doing the work; the block is only supplying the colour.
- A one-deep pond will not flow anywhere as long as the stone lip is unbroken, so pour the water last and walk the whole edge before you leave it.
- The white wool ducks are a stand-in. Fence a corner and drop in a couple of chickens and they will use the bank in exactly the same way.