How to build the Hanging Gardens in Minecraft
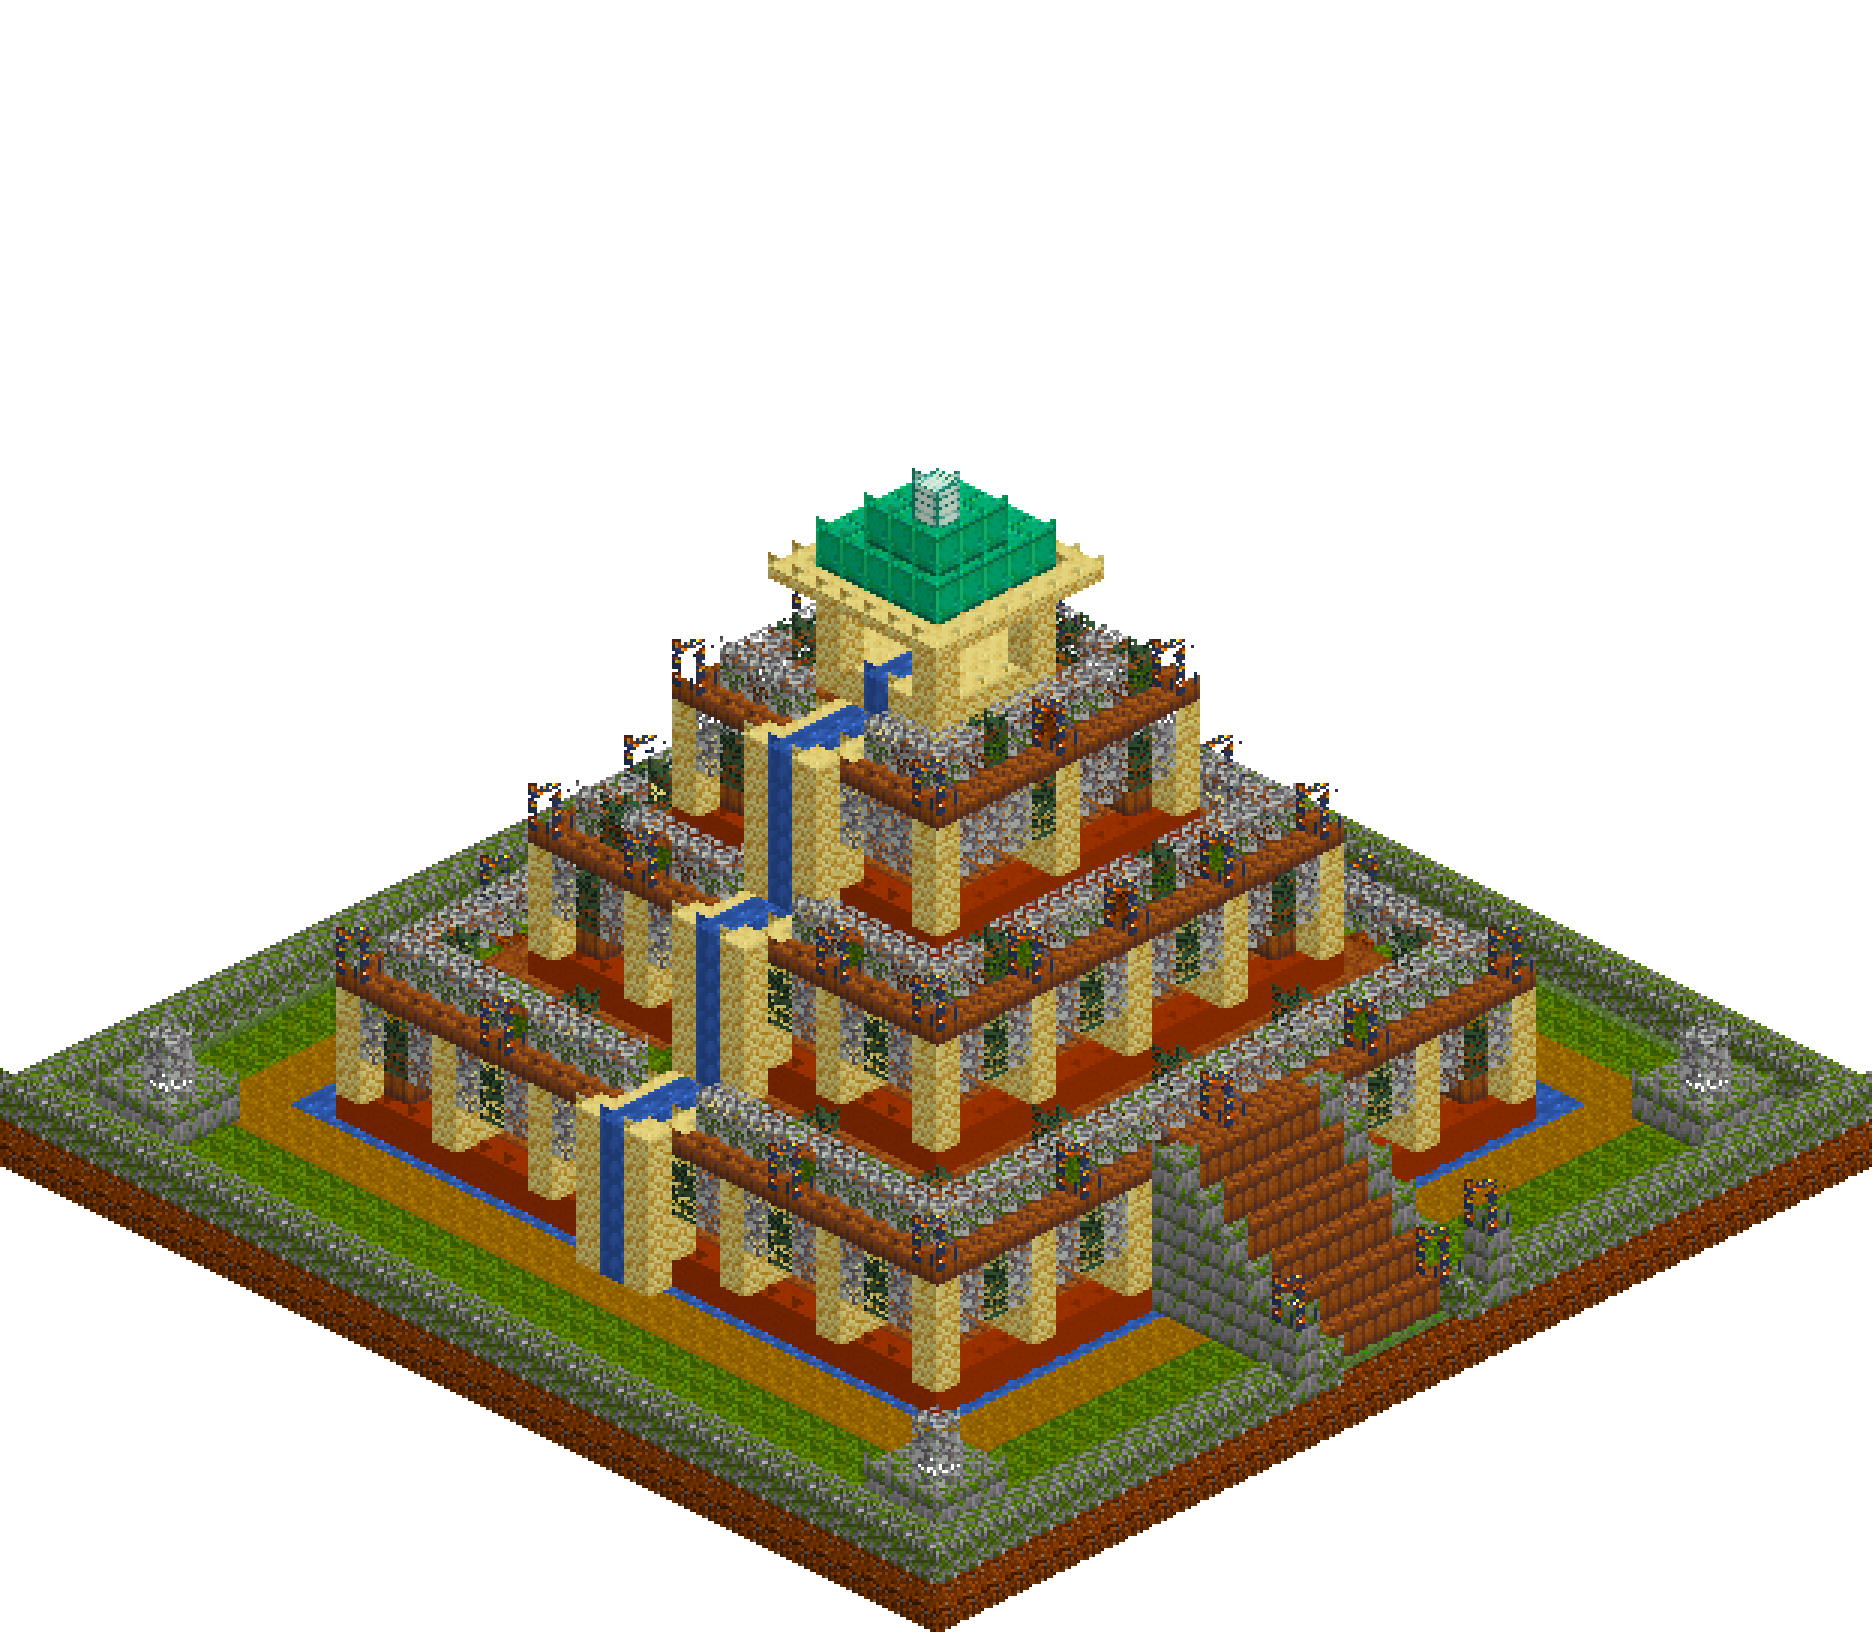
A ziggurat you can walk into. Three mud-brick terraces step back four blocks at a time, and each one is edged with a planting bed that spills oak and spruce down over the sandstone colonnade below — so the whole mass reads as a hill that has been gardened, not a pile of blocks. Water begins as a spring in the summit shrine, drops down three channelled cascades and lands in a rill that rings the base. Every tier is a hollow shell, which means three cool colonnaded halls inside as well as the gardens on top.
What you need
| Block | Count |
|---|---|
| Mud bricks | 2465 |
| Coarse dirt | 1579 |
| Moss block | 454 |
| Sandstone | 365 |
| Oak leaves | 355 |
| Grass block | 296 |
| Dirt path | 232 |
| Terracotta | 191 |
| Mud bricks slab | 186 |
| Mossy cobblestone | 145 |
| Water | 135 |
| Packed mud | 135 |
| Spruce leaves | 119 |
| Mossy stone bricks | 80 |
| Chiselled sandstone | 75 |
| Lantern | 54 |
| Sandstone slab | 44 |
| Oxidized copper | 34 |
| Sea lantern | 1 |
Counts are exact for the model above. Mine a little spare — nobody places every block first time.
Building it
Each stage names the layers it covers. Drag the slider on the model to that layer and you are looking at exactly what the stage describes.
1.Ground, rill and boundary wall
Lay the ground as concentric plates before anything stands up: coarse dirt to y0, turf over the lot, then moss, dirt path, a one-block water rill and mud-brick paving, each plate two blocks narrower than the last. Six boxes and the landscape plan is finished. Ring the plot with a single course of mossy cobblestone at y2 and clear the middle out again, which leaves a kerb one block thick with a gap on the east side for the gate and its two lantern piers. The rill matters more than it looks — it is what the three cascades fall into, so the water arrives somewhere instead of simply stopping on paving.
2.First terrace and its colonnade
Set a terracotta plate at y2 one block wider than the wall, so the tier stands on a visible foot. Build the body as a hollow box from x8 to x30: the shell gives walls, floor and terrace deck in one op, with four blocks of headroom inside. Cut the loggia openings out of the two front walls afterwards — carving always follows the mass. The elevation is then made on the ring line: sandstone pilasters every four blocks at y3 to y5, chiselled capitals at y6, and leaves packed into the recesses between them at y5 and y6 so the planting appears to pour out from under the terrace. Finish with a deck oversailing to x7, sitting on the pilaster heads.
3.Second terrace and the planted rings
Repeat the tier-one recipe inset four blocks all round, x11 to x27, which leaves a four-wide walk on the terrace below — two blocks of bed, two of path. Surface it in rings: mud-brick slabs as a coping at the very edge, moss speckled with coarse dirt for the bed, packed mud for the walk. Keeping the coping a slab rather than a full block is what stops the terrace reading as a parapet; you see over it from the walk, and from the ground it draws a fine dark line along every step. Lanterns sit on the coping every four blocks, close enough to light the walk and to mark the tier after dark.
4.Third terrace
The third tier steps in three rather than four, x14 to x24, so the walk narrows as you climb and the ziggurat looks taller than its 28 blocks. Pilasters go to a five-block spacing here, which still gives the smaller ring three columns a side with a single mullion dividing each loggia. Keep the same three-band terrace surface — coping, bed, walk — because the repetition is what ties the three levels into one building. By this point the sequence should be muscle memory: hollow box, carve the openings, ring the pilasters, oversail the deck, plant the bed.
5.The summit shrine
The shrine is a five-by-five sandstone pavilion, hollow, with the middle of each wall cut away to leave four corner piers carrying a solid lintel. Its floor holds the spring: one water block at the centre, with a groove cut out through the front wall so the source has somewhere to go. A ring of sandstone slabs at y24 gives the eaves an overhang, then two stepped courses of oxidised copper and a sea lantern finial at y27. That copper is the only cool colour above ground, and against all the mud brick below it does exactly what a roof should — it ends the silhouette.
6.The falling water
Do the water last so nothing overwrites it. Three sandstone piers project from the front of the tiers at x18 to x20; drop a single column of water down the centre of each, from deck level to the terrace beneath. On every terrace a groove runs from where the water lands across to the next lip, kerbed on both sides with sandstone slabs so it reads as a built channel rather than a puddle. In survival, place one source at the head of each groove and let it run — three blocks of channel carries perfectly, and the fall down the pier face needs no help at all.
Make it yours
- Hold the set-back at four blocks on the lower tiers and three at the top. A constant set-back makes the profile look mechanical, whereas a shrinking one reads as perspective and buys apparent height for nothing.
- Mix oak and spruce leaves at roughly three to one instead of using either alone — a single leaf type flattens into one green mass from ten blocks away, and the darker spruce is what gives the planting depth.
- Space the coping lanterns wider on the big tier and tighter on the small ones — six, then four, then five blocks. Equal spacing everywhere leaves the top terrace under-lit and the bottom one looking like a runway.
- Carve every opening after the mass that contains it. Building a wall around a doorway means counting to the doorway twice; cutting one out of a finished wall is a single clear and it always lines up.
- Mud brick is cheap in survival: dirt plus a water bottle gives mud, mud plus wheat gives packed mud, and four packed mud craft four mud bricks. A wheat farm beside the site pays for the entire ziggurat.