How to build the Town Square and Clocktower in Minecraft
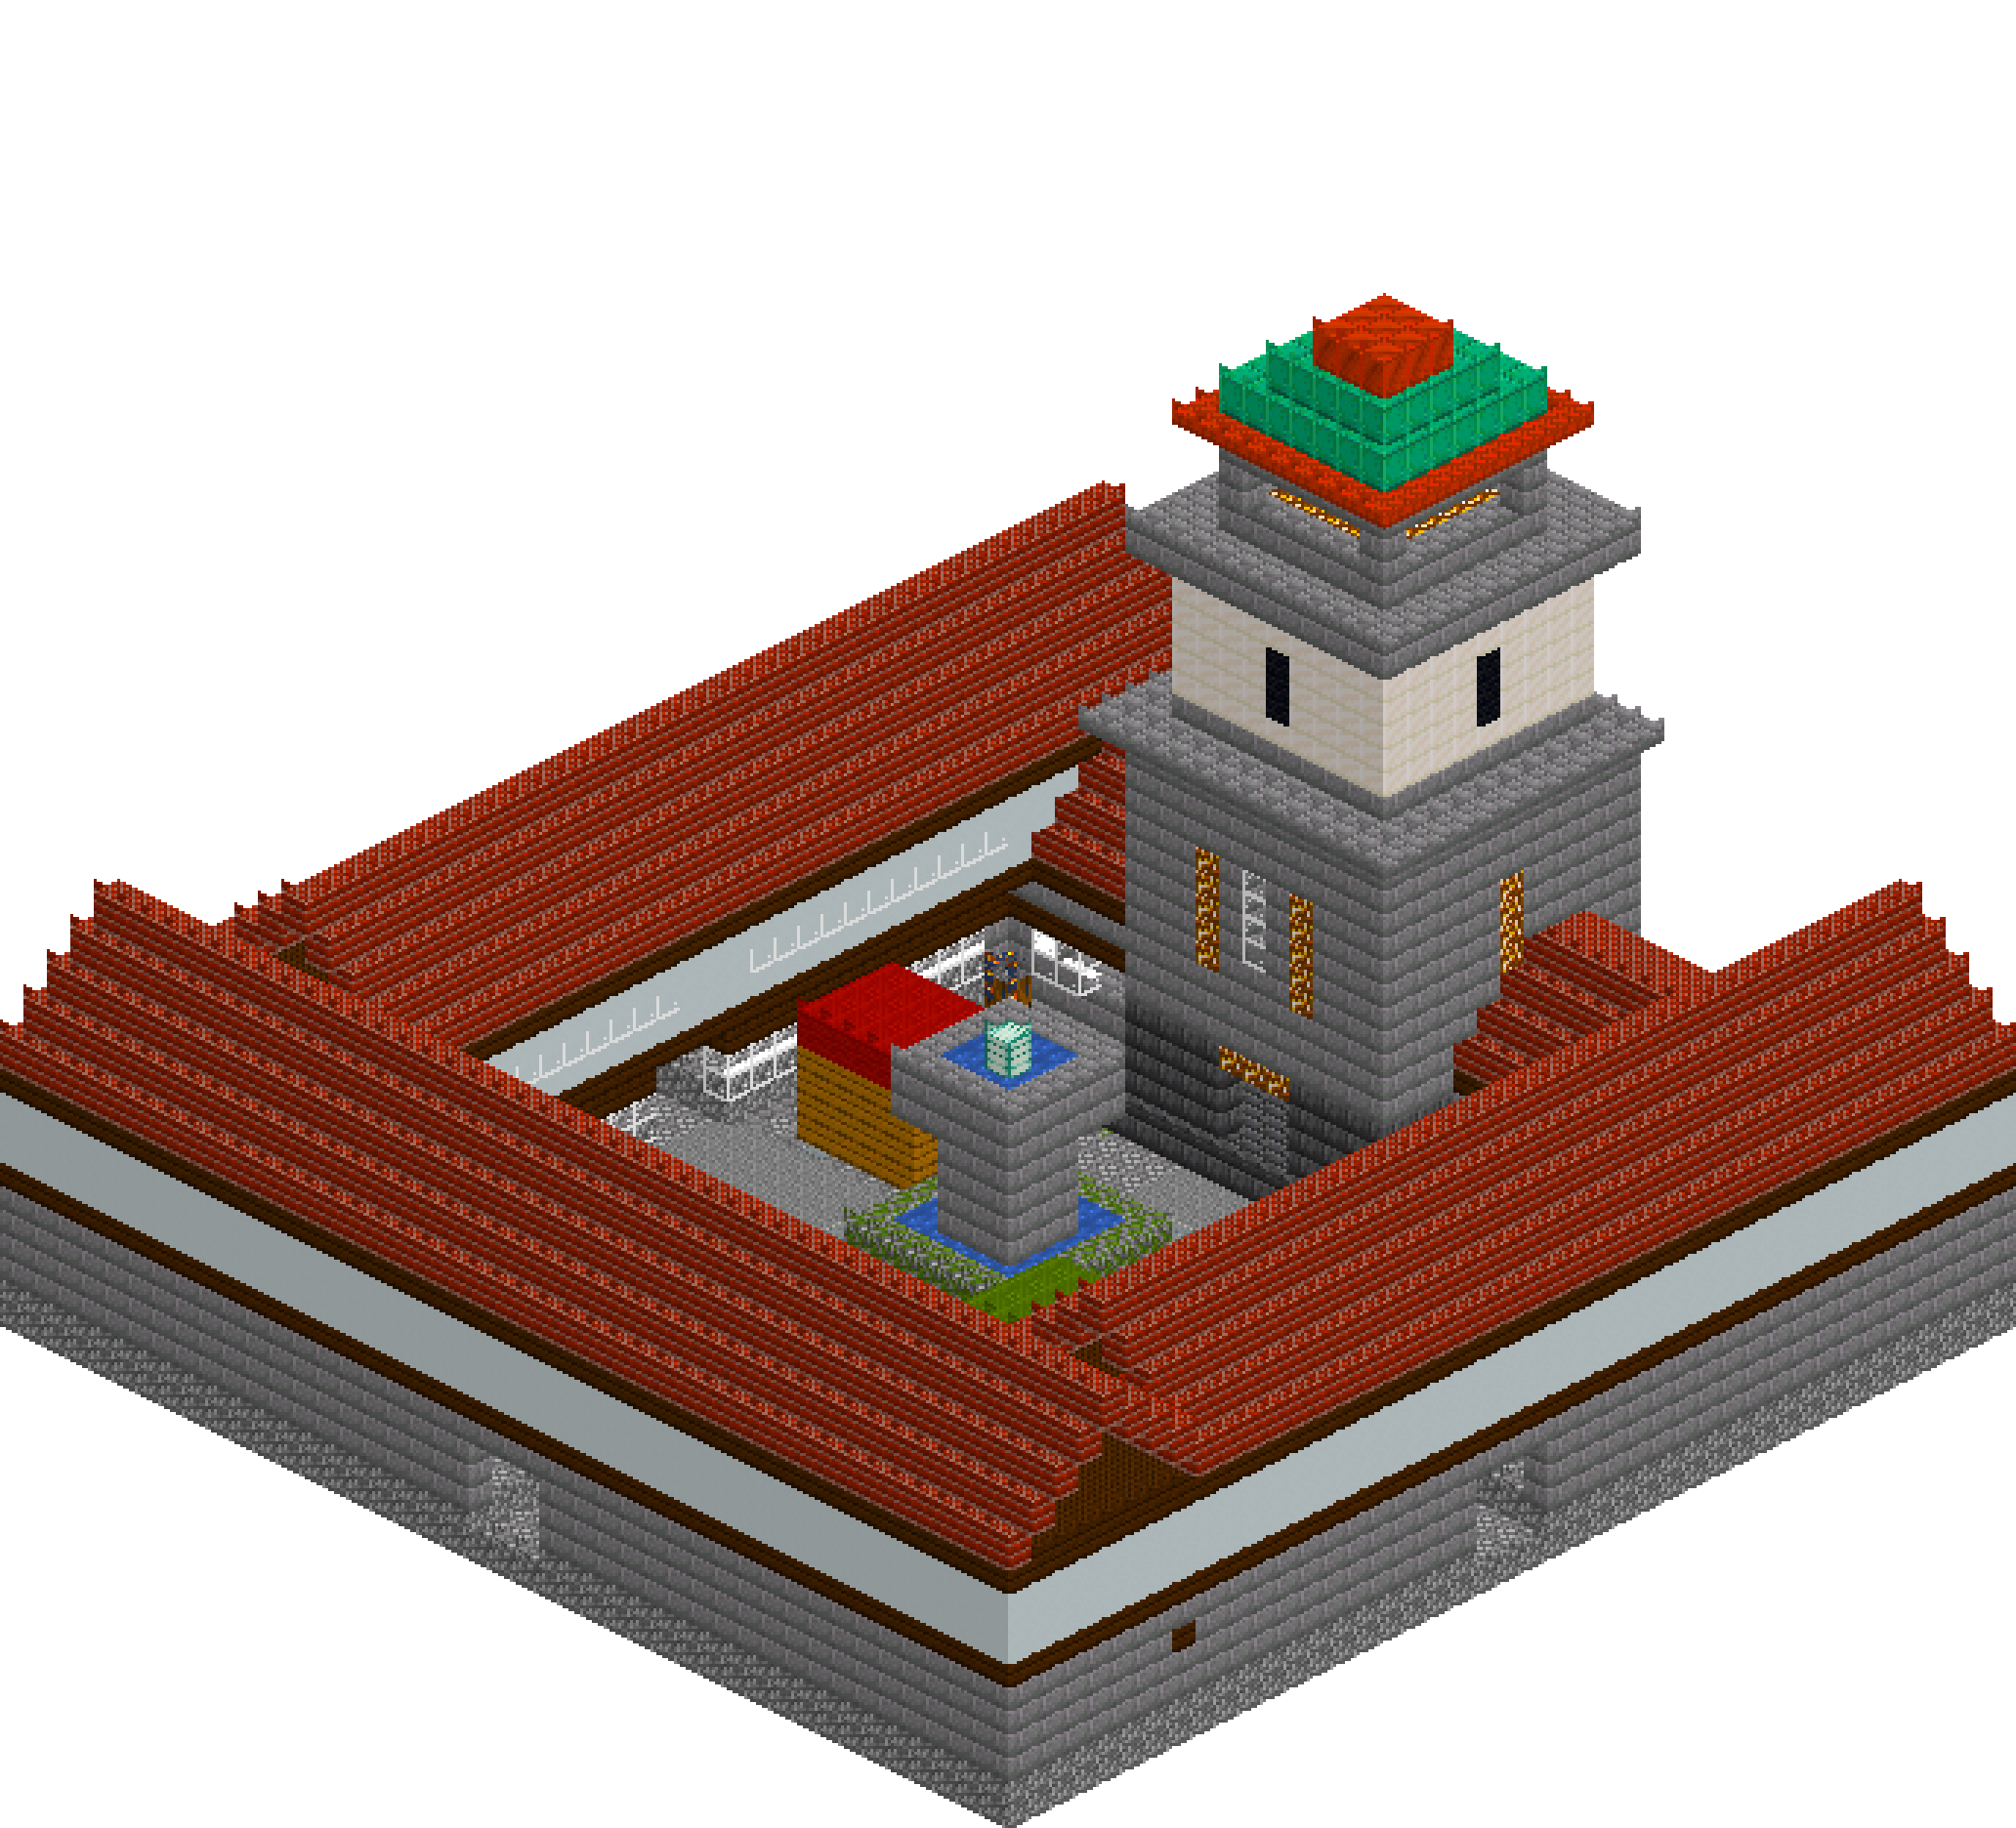
Most Minecraft towns are a scatter of houses. A square is what turns them into a place: buildings that face one another across a shared floor, with something worth walking to in the centre. This one is 43 blocks across — cobbled paving with a fountain at the crossing, terraces of two-storey shops whose upper floors jetty out a block over the pavement, and a 33-block clocktower with four quartz dials and an oxidised copper spire holding down the north side. The clever part is that almost none of it is fiddly. The terraces are horizontal bands repeated three times, and the tower is a stack of boxes that steps inward twice on the way up. Get the paving and the datum lines right and the rest is bricklaying.
What you need
| Block | Count |
|---|---|
| Stone bricks | 3080 |
| Dark oak planks | 2226 |
| Cobblestone | 2166 |
| White concrete | 1421 |
| Bricks | 1141 |
| Deepslate bricks | 385 |
| Quartz block | 246 |
| White stained glass | 218 |
| Stone bricks slab | 156 |
| Polished andesite | 148 |
| Oak planks | 112 |
| Stone | 84 |
| Cut copper slab | 81 |
| Mossy cobblestone | 74 |
| Oxidized copper | 74 |
| Glowstone | 48 |
| Water | 40 |
| Red wool | 28 |
| Green wool | 28 |
| Oak log | 16 |
| Black wool | 12 |
| Copper block | 9 |
| Lantern | 4 |
| Sea lantern | 2 |
Counts are exact for the model above. Mine a little spare — nobody places every block first time.
Building it
Each stage names the layers it covers. Drag the slider on the model to that layer and you are looking at exactly what the stage describes.
1.Lay the floor before you lay a single wall
Flood the whole 43 by 43 plot with cobblestone at y=0, then draw the paving on top of it. The pattern is concentric: a stone brick kerb ring right on the building line at x/z = 8 and 34, an inner ring of andesite and brick, and rings of andesite and stone brick tightening around the fountain. Cut two three-wide stone spokes through it on the centre lines, and scatter mossy cobblestone through the plain zones so the floor reads as worn rather than tiled yesterday. This floor is the drawing. Every wall below comes off the kerb ring, and the spokes line up with the three street entries you cut later — if the paving is right, nothing after it needs measuring twice.
2.Ground storeys and shopfronts
Three hollow stone brick boxes make the terraces: west at x 0-7, east at x 35-42, both running z 0-34, and the south range across the full width at z 35-42. Drop a solid course of cobblestone at y=1 through each one — that is the damp course you see outside and the shop floor you stand on inside, in a single op. Run a continuous dark oak lintel along each square-facing wall at y=4, then glaze y=2-3 beneath it in two separate runs rather than one. The gap between the runs leaves a solid masonry pier in the middle of each terrace, which is what stops a 34-block shopfront reading as a bus shelter.
3.The jetty and the plastered upper floor
The overhang is the whole character of the build, and it costs one op per range. Lay a solid dark oak course at y=6 that is one block wider than the storey below, projecting into the square only — never out the back. Sit the upper storey on it as a hollow white concrete box aligned to the new, wider face, then cap it with another dark oak course at y=10 so the plaster is trapped between two dark beams. Slot a one-block window ribbon into the jettied face at y=8, again in two runs so the piers below line through. Dark, white, dark: three bands, and the terrace suddenly has depth.
4.Tiled roofs and cutting the streets in
Each terrace is 9 blocks across once the jetty is counted, so a gable spanning 9 rises 4 and lands at y=15 from a base of y=11. Run the west and east ridges along z, the south ridge along x, all in plain bricks — a warm red tile against white plaster is the single biggest colour decision here. Build the south range's roof last so it caps the two corner junctions cleanly. Only now cut the three entries: clear a 3-wide, 4-tall slot straight through each range at y=1-4, west and east at z 20-22 and south at x 20-22. They land on the paving spokes, and the jettied floor above turns each one into a covered pend.
5.Low arcades to make room for the tower
The north side is not a terrace, and it must not be. Build two single-storey stone brick boxes at x 8-15 and x 27-34, z 0-7, only 6 blocks to the wall head, with the same cobblestone base course, the same dark oak lintel at y=4 and glazing at y=2-3, plus a dark oak eaves band at y=6. Roof them with gables spanning 8, which rise 3 to y=10. That is two-thirds the height of the terraces, and deliberately so: the tower needs something small either side of it or it reads as a wall with a lump on top rather than a tower rising out of a town.
6.The tower shaft
Set an 11 by 11 tower at x 16-26, z 0-10 so it noses three blocks out past the arcades into the square — projecting the mass is what makes it feel civic. Start with a deepslate brick pad one block proud all round at y=1, then a hollow deepslate base storey to y=5, matching the shopfronts' datum exactly. Above that a hollow stone brick shaft to y=16. Cut a 3-wide door through the south face at y=2-4 and put glowstone straight in the lintel above it, then run four 5-tall glowstone lancets up the shaft at y=9-13. Finish with a stone brick slab cornice at y=17, one block proud all round, which is the shelf the whole upper tower steps back from.
7.Clock stage, belfry and copper spire
Step in to 9 by 9 at y=18 and build a hollow stone brick stage to y=24, then overwrite y=19-23 with a hollow quartz box — that gives a five-block white band wrapped round all four faces in one op. Drop a 3-block black wool bar down the centre of each face and you have four legible dials. Cornice at y=25, then a 7 by 7 belfry to y=29 with two clear cuts taken through it at y=27-28, which opens an arch on every face while leaving the corner posts and the lintel intact. Glowstone on the belfry floor lights all four arches at once. Cap it with a flared cut copper slab eave at y=30, then oxidised copper at 7, 5 and 3 wide up to y=33.
8.Fountain, stalls and lamps
Work the fountain solid-then-carve: a 9 by 9 stone brick step at y=1, a solid mossy cobblestone block 7 by 7 and two tall on top of it, then carve the pool out with a box of water, leaving a one-block rim. Run a 3 by 3 pier up the middle to y=8, cap it with a 5 by 5 plate at y=9 that cantilevers a block, carve that with water too and stand a sea lantern in the centre so the water glows after dark. Add four oak lamp posts with lanterns at the quadrant points, and two market booths — hollow plank boxes with the front punched out and a wool awning oversailing towards the fountain, one red, one green.
Make it yours
- Set the shopfront wall head, the tower base storey and the arcade lintel all at the same y. Real squares look coherent because their floor levels agree, and here that single shared datum at y=5 does more work than any amount of decoration.
- Do the gable sum before you commit to a height. A 9-wide roof rises 4, so from y=11 it tops out at y=15 — if you had guessed 5 the build would need a taller box and the tower's proportions would shift with it.
- Never run glazing the full length of a terrace. Break every window run into two, leave three or four blocks of solid masonry between them, and the piers you get for free read as separate shops rather than one long shed.
- Build the fountain and the belfry solid first, then subtract. Boxing the mass and carving water or arch openings out of it costs two ops and always lines up; placing the rim block by block costs thirty and never quite does.
- Put the light inside the stone, not on top of it. Glowstone on the belfry floor spills out through four arches, glowstone in the door lintel washes the tower entrance, and neither one is visible as a glowing lump in daylight.