How to build the Roman Aqueduct in Minecraft
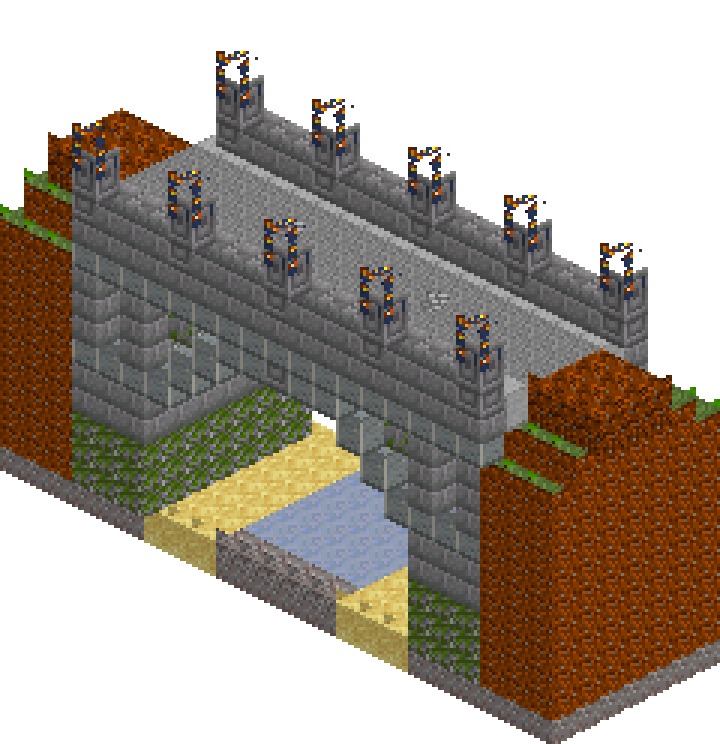
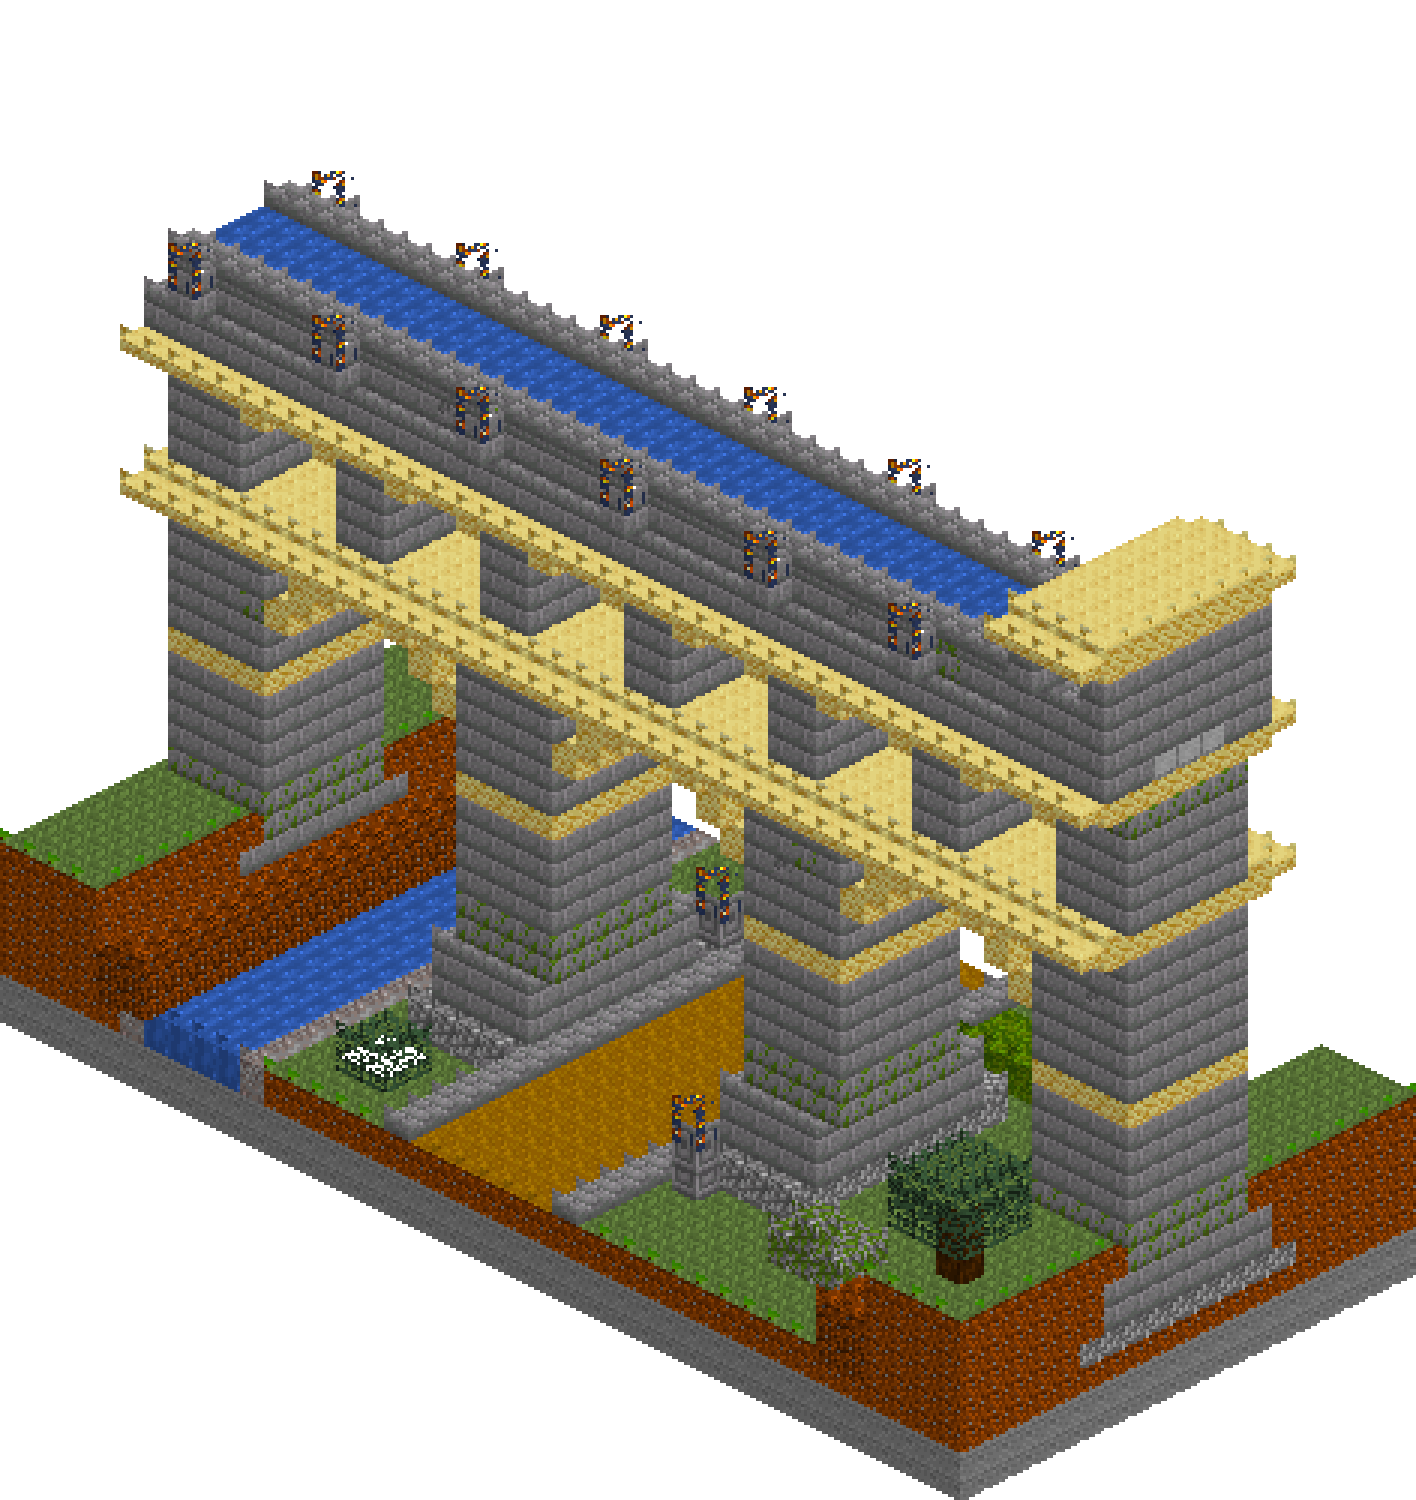
Rome's engineers moved water across valleys by refusing to let it fall — a channel laid at a whisper of a gradient, carried on whatever height of masonry the ground demanded. This one crosses a shallow valley in two storeys: three eight-block arches below, six short ones above, a stone brick body banded with sandstone at every string course, and water genuinely running along the top into a header tank at the high end. A road and a brook pass underneath, which is what gives the whole thing its scale. No redstone, no rare blocks — 6,500 blocks of rhythm that will anchor an entire landscape and give a village somewhere to put its road.
What you need
| Block | Count |
|---|---|
| Stone bricks | 1817 |
| Stone | 1520 |
| Sandstone | 908 |
| Grass block | 644 |
| Dirt | 272 |
| Mossy stone bricks | 200 |
| Water | 193 |
| Sandstone slab | 168 |
| Coarse dirt | 152 |
| Cobblestone | 144 |
| Smooth stone | 120 |
| Dirt path | 114 |
| Stone bricks slab | 114 |
| Cracked stone bricks | 41 |
| Gravel | 38 |
| Spruce leaves | 38 |
| Lantern | 16 |
| Mossy cobblestone | 11 |
| Moss block | 6 |
| Spruce log | 6 |
| Chiselled stone bricks | 4 |
Counts are exact for the model above. Mine a little spare — nobody places every block first time.
Building it
Each stage names the layers it covers. Drag the slider on the model to that layer and you are looking at exactly what the stage describes.
1.Cut the valley, the road and the brook
Lay a 40 by 19 pad of stone two deep and cap it with grass at y=2 — that is the valley floor. Bank both ends up with dirt to y=5 and a grass crest at y=6 so the aqueduct springs from hillsides rather than out of flat ground. The road is six blocks of dirt path crossing the short way at x=17-22, and the brook is four of water at x=6-9 with a gravel bank either side. Put both in before a single stone goes down, because they decide where the piers can stand. An aqueduct that ignores what it crosses reads as a wall with holes punched in it.
2.Plinth, batter and the four piers
Piers sit at x=0-3, 12-15, 24-27 and 36-39, which leaves three openings eight blocks wide — the road passes under the middle one, the brook under the first. Build the tier as full-length slabs and carve the openings afterwards, so every pier comes out identical: a nine-thick cobblestone plinth at y=3, seven-thick stone brick at y=4-5, then a mossy five-thick course at y=6-7 and the body above. That stepping is the batter, and it is the reason the piers look like they are carrying something. Keep the spandrel wall between piers only three thick (z=8-10) so the piers stand a block proud on both faces, band the top with sandstone at y=12, then clear each opening from y=3 to y=14 in one cut.
3.Striking the arch, not stepping it
The usual failure is stepping in one block per course straight off the impost: that makes a triangle. Strike the curve from a centre instead. The opening is eight wide, so the radius is four and the centre sits on the impost line at mid-span; keep every block whose centre falls inside that radius. That gives widths of 8, 8, 6, 4, 2 up from the band — two courses dead straight, then the head closing fast, which is what a half-circle does. Lay each step in sandstone and the ring reads as voussoirs, with a two-block keystone at the crown. The spandrel behind stays three thick, so ring and piers project and the panel between them falls into shadow. Cap it with a sandstone cornice at y=19.
4.The upper arcade
Six openings four wide with two-wide piers between them, and the spacing is the whole trick: the upper piers repeat every six blocks, which drops one on top of every lower pier and one on top of every lower keystone. Load goes where load can be carried, and the elevation reads as designed rather than assembled. Box the tier solid from y=20 to y=22 and cut the six openings out; the heads are then a single course at y=23 with two-wide voids and sandstone either side, because a semicircle over a four span rises just one course. Tie it with a solid course at y=24, keystones in sandstone, and repeat the cornice and slab lip at y=25.
5.The specus, the coping and the lamps
The deck is seven wide. Stone brick at y=26, with the middle three lined in smooth stone — that is the specus, the channel the water actually sits in. Raise walls at z=7 and z=11, fill z=8-10 with water at y=27, and cap the walls with stone brick slabs at y=28: half a block reads as a coping where a full block reads as a second wall. The outer strips at z=6 and z=12 are the inspection ledge. Set a block post on each at every sixth column and a lantern on top, so the lights sit directly above the piers and line up down the whole length instead of scattering.
6.Castellum, rubble and planting
Water has to arrive somewhere. At the high end a small header tank — a hollow stone brick box from y=27 to y=31, a three-wide mouth where the channel runs in, two-course windows on each long face and a lantern hanging inside — gives the silhouette something taller than the parapet and explains the whole structure at a glance. Cap it in sandstone with the same slab lip as the cornices so it belongs to the building. Down at ground level, drop mossy cobble where stones have come off the pier, patch the grass with moss and coarse dirt, plant a spruce on each bank, and stand a lit chiselled milestone either side of the road where it passes beneath the middle span.
Make it yours
- Set the piers before anything else and space them around what the aqueduct crosses — road under the middle span, brook under the first. A pier landing in the middle of the road is the fastest way to make a bridge look pasted onto the terrain.
- Cut, do not stack. Build each tier as one full-length mass and carve the openings out of it; every arch then comes out identical, and the banding courses run through the piers and stop dead at the voids exactly as real masonry does.
- Keep the spandrel wall one block thinner than the piers and the arch rings. That single recess does more for the elevation than any amount of block variety, because it puts real shadow between the ring and the pier.
- Mossy and cracked stone bricks belong low down and around the arch heads where water has run, not sprinkled evenly — roughly one block in twenty is plenty. Age reads as a pattern of wear, never as noise.
- If your valley carries a river instead of a road, extend the pier plinths into the water and taper the upstream end to a point. A square pier standing in a current always looks wrong; a cutwater fixes it in four blocks.